Ever host an application or website and wish you could easily harden it security wise? Well today I will show you how you can easily lock down part of a website or its entirety by using Cloudflare’s Zero-Trust platform for free.
Please note that for this to work, your website/application must be proxied by Cloudflare (that’s the orange cloud)
PS. If you are having trouble seeing an image, click on it to open it in full
Setting up Cloudflare Access
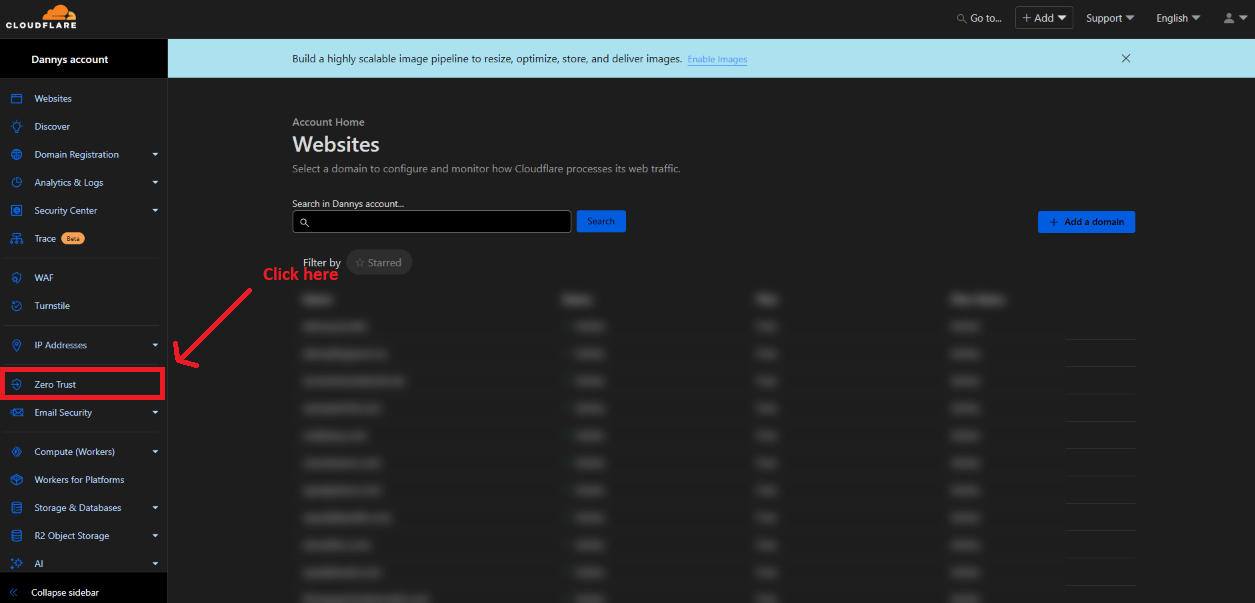
For this tutorial, I will start by logging into my CF (this is what I will call Cloudflare from now on) account.
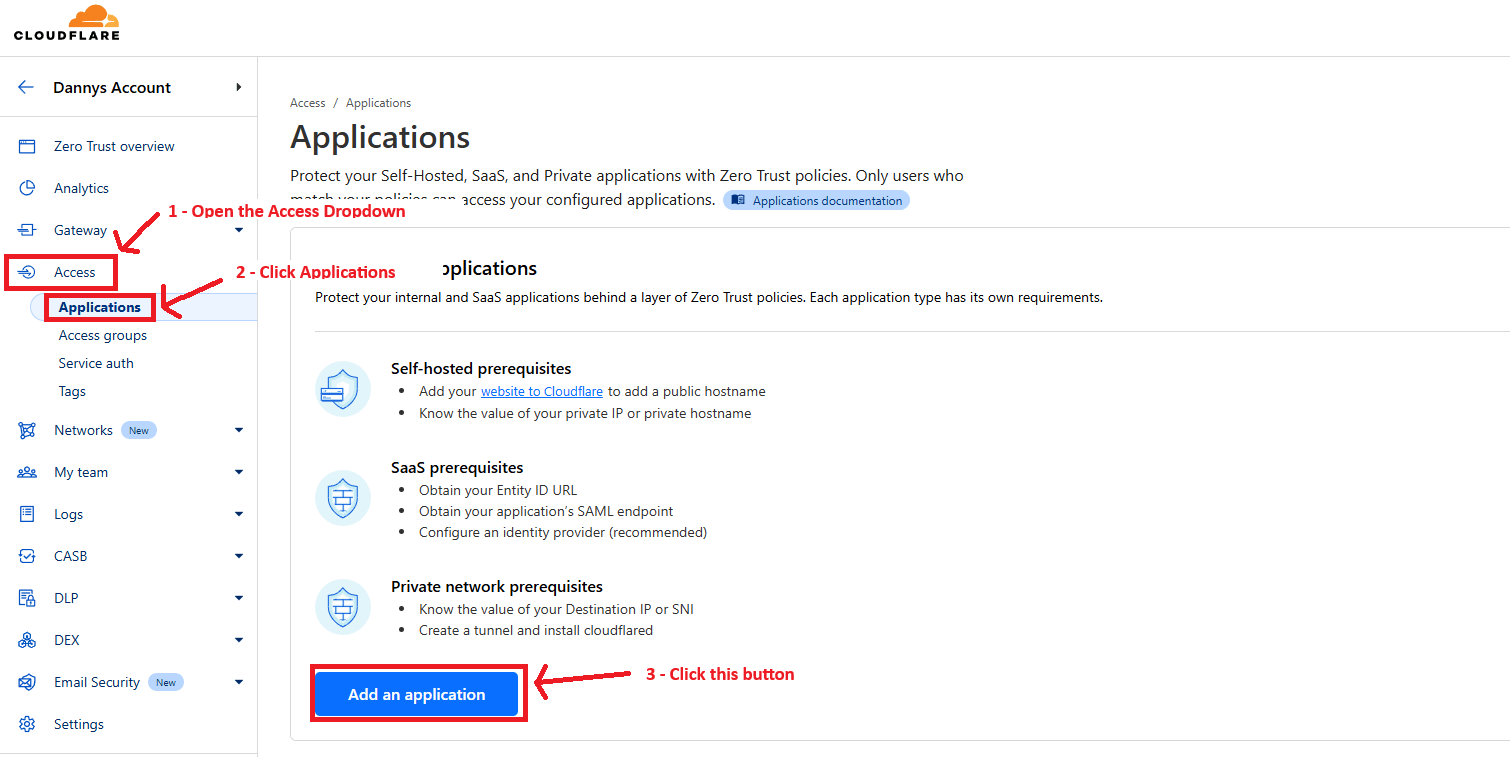
Then I will click on “Access” in the sidebar to expand the dropdown and click on “Applications” and then the “Add an application” button. Sadly no dark theme for this yet.
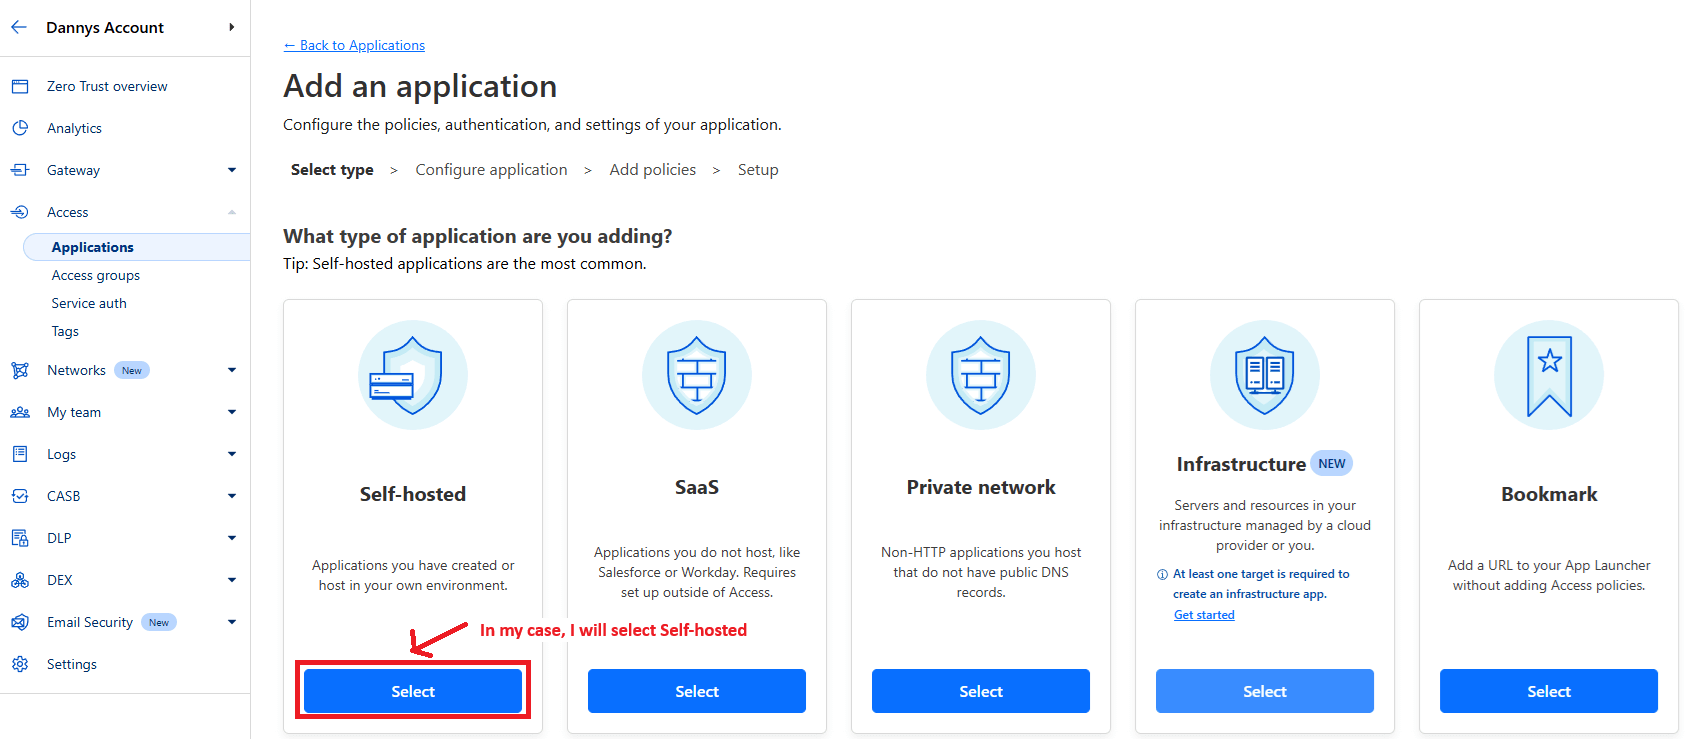
Next you have to select which kind of application you want to protect, as you can see there are many more options than what I outlined in this post. For this post’s purposes we will go with Self-hosted, this is what I would use to protect a PhpMyAdmin installation or in this case, a page on my personal website.
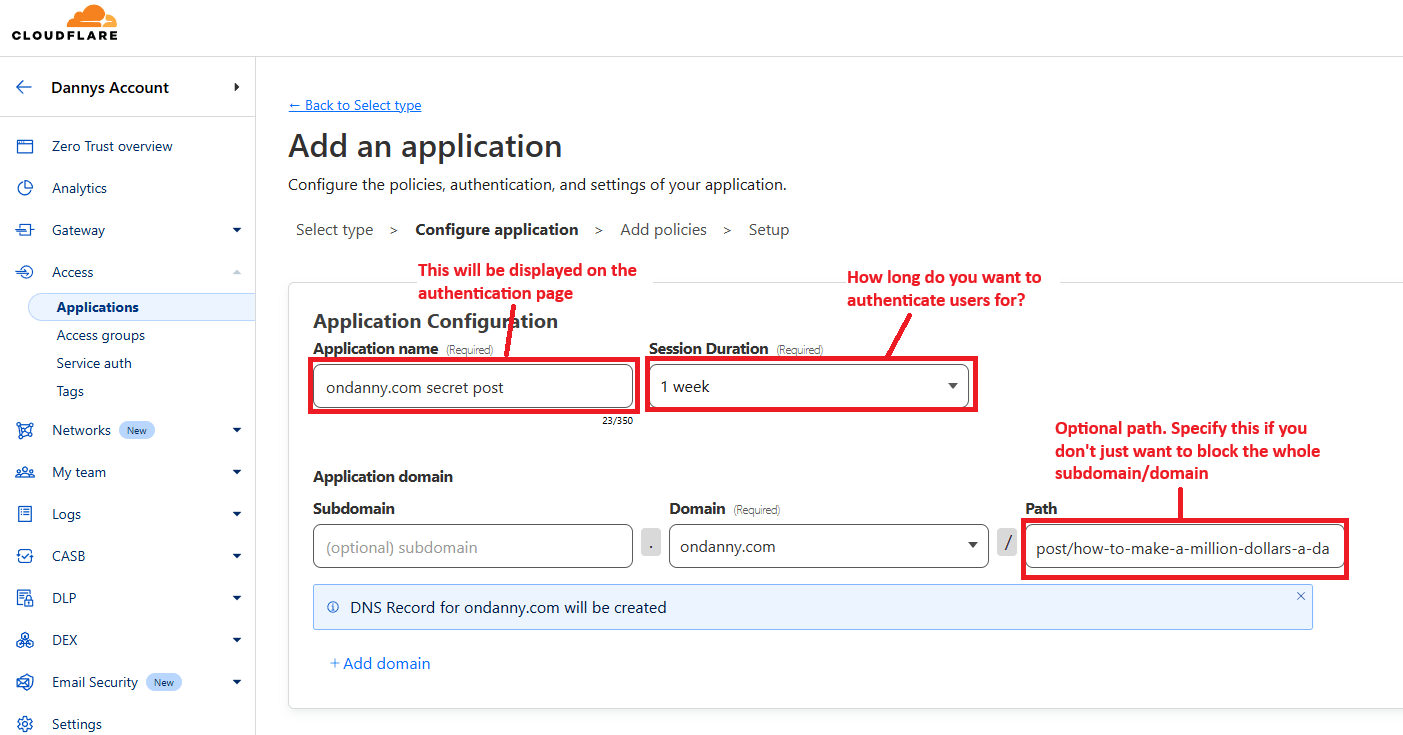
This is the most important step and where you can decide whether to block only one path or the entire subdomain/domain. The only required field is the domain one so if you specify nothing else, it will block everything going to yourdomain.com.
In my case, I wanted to block a specific path on ondanny.com so I selected the right domain, then put the full path. You can also use wildcards (*) to block subpaths like /post/secret/* for example.
The application name is not too important but do note that it will show up on the public block page. And the session duration determines how often you have to authenticate through Cloudflare for this application.
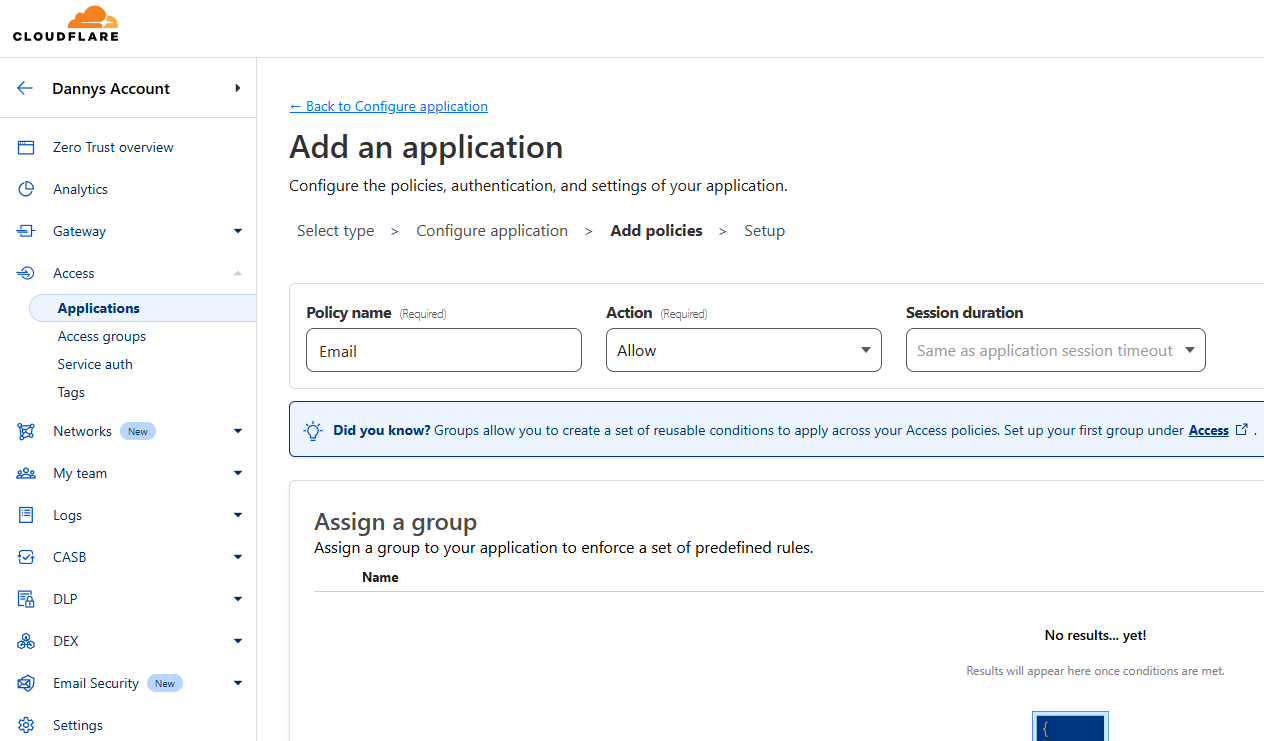
On the next page, you will be able to add policies, which are ways to authenticate. In my case, I plan on allowing specific emails so I just called my policy “Email”.
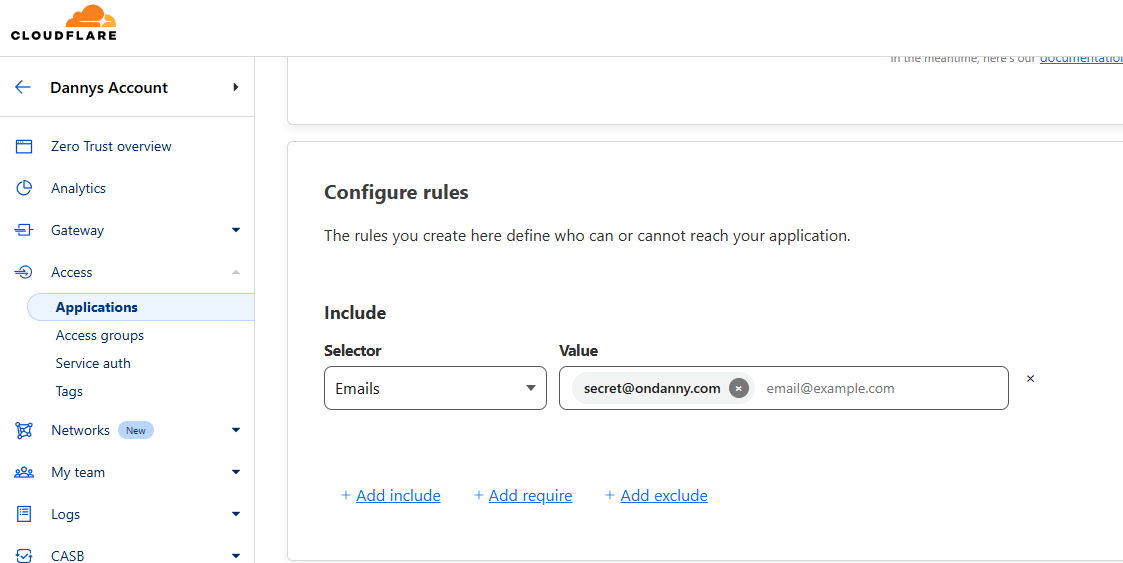
Lower on the same page, you can specify the actual ways to authenticate. There are many options, aside from specifying a list of emails, you have the following options (not an exhaustive list, only the ones I think are most relevant):
- Emails ending in (useful for emails ending in @domain.com)
- IP ranges
- Login Methods (can setup one-time pin auth)
- Service Token
- Any Access Service Token (like the previous option but you wouldn’t specify the token)
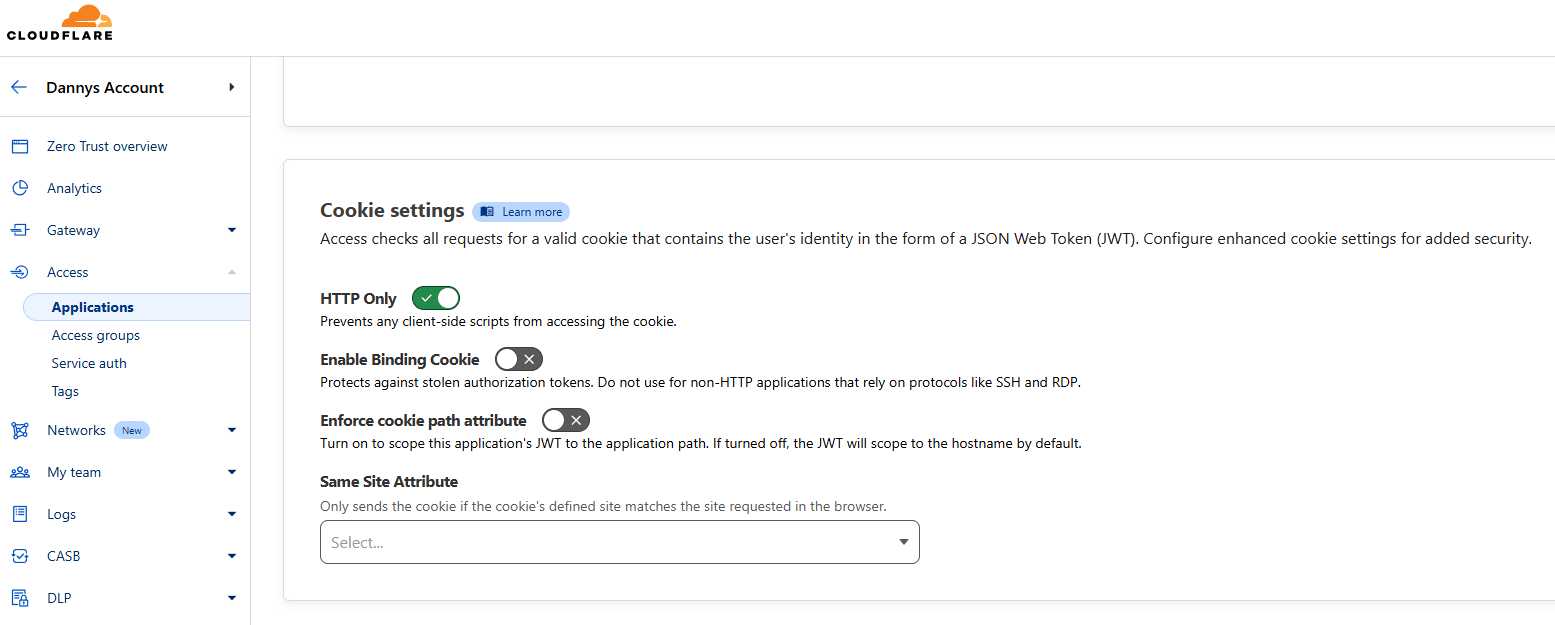
So now that I specified that only my email can access this page, we are almost done. On the next page, you can configure a few extra security properties, since I only intend on reaching this website via browser, I make sure to set the cookie to HTTP Only for the added security it provides.
Finally, hit “Add Application” at the bottom of the page and you should be redirected to a list of your applications. As you can see, it lists the app name and URL. Confirming everything is setup!
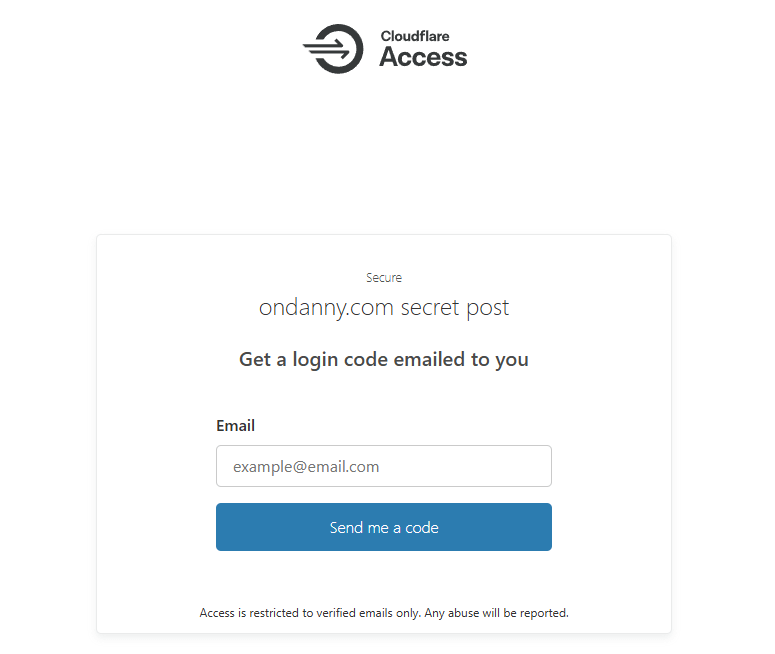
Now if you try to hit your protected URL, you see this page which will ask you for an email. If you provide any email other than the allowed ones, it will pretend that it sent you a code, but you will never get it (to keep haxors waiting)!
So to recap, using the techniques in this guide, I was able to hide a specific part of my application behind email authentication. This is a powerful offering by Cloudflare that’s free for up to 50 users.
The only thing you need is for your domain to be proxied by Cloudflare and of course if you are blocking a specific path, for it to be server rendered (because if its an SPA and they can navigate to it from within the app, they will for obvious reasons be able to still see the page).
Thanks for reading,
Danny
